一个CloudFlare提速的插件
步骤#01:安装WP Cloudflare Super Page Cache
步骤:进入WordPress后台,在安装插件的地方搜索”WP Cloudflare Super Page Cache“
官网地址:https://wordpress.org/plugins/wp-cloudflare-page-cache/
步骤#02:设置WP Cloudflare Super Page Cache
WordPress后台——>Setting——>找到WP Cloudflare Super Page Cache
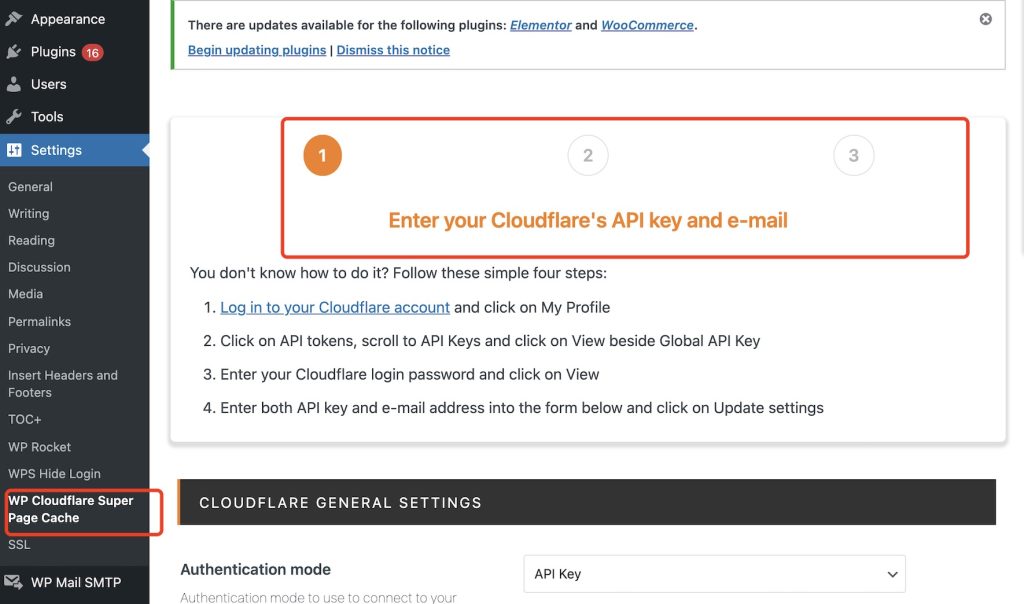
配置方式01:使用API Key的方式
这个需要输入CloudFlare的邮箱地址和密码
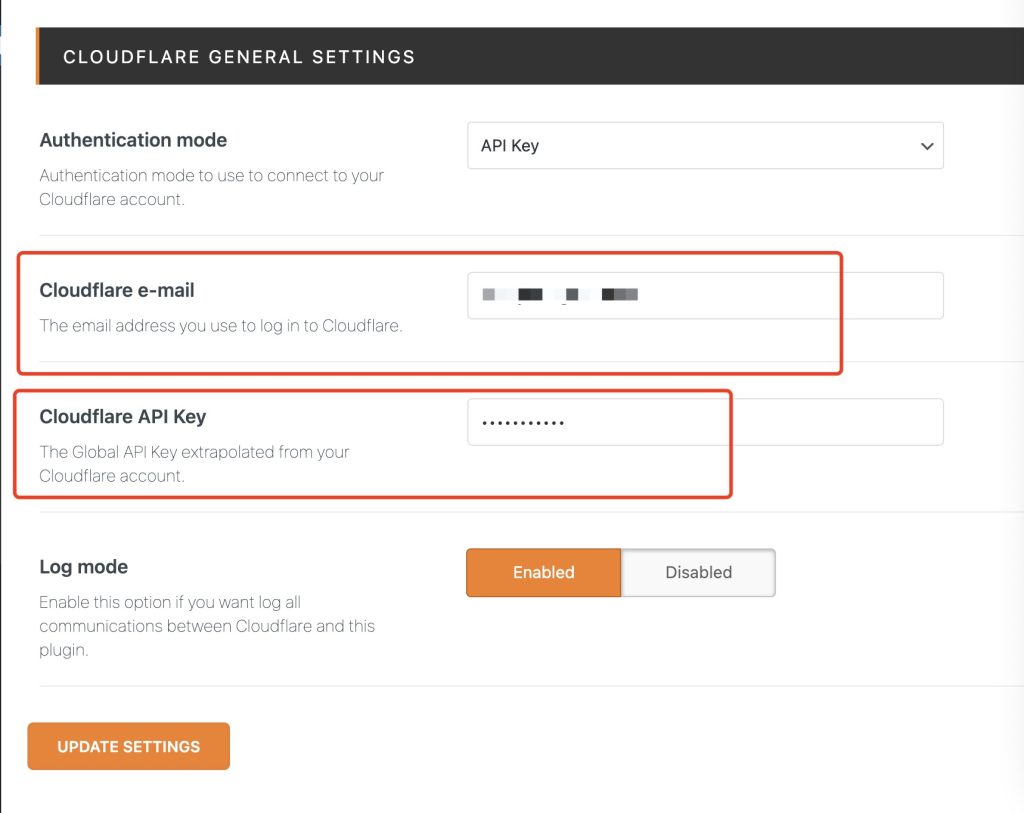
配置方式02:使用API Token的方式
这个只需要输入邮箱地址和一个Token,不需要密码。
首先登录CloudFlare,点击”我的个人资料“。
然后点击左侧的”API令牌“
点击”创建令牌“
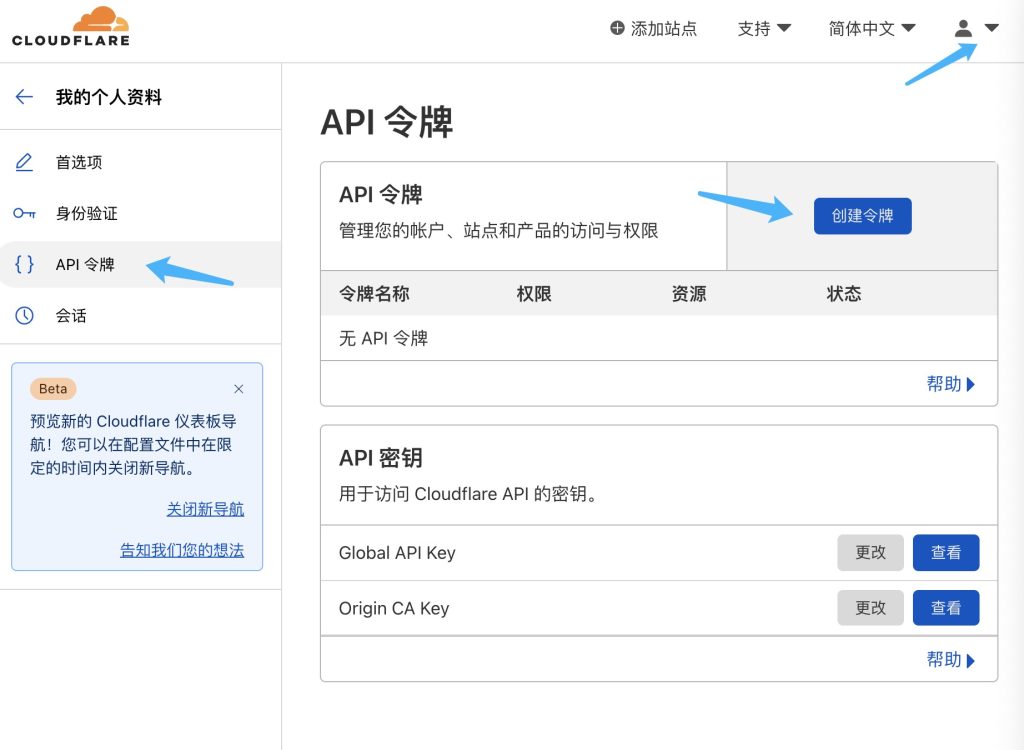
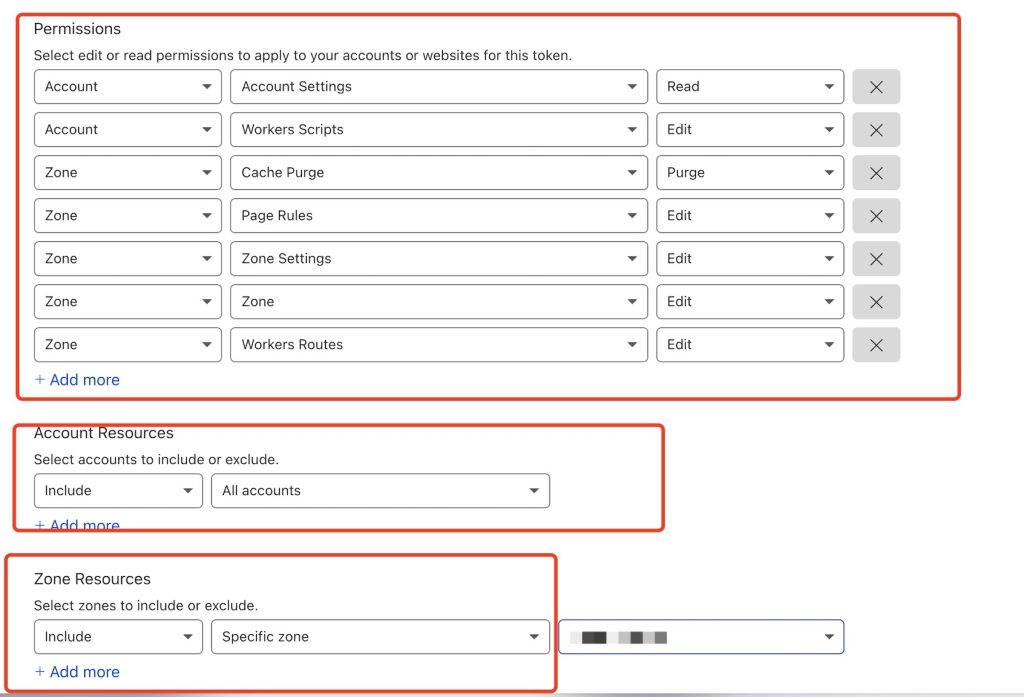
选择自定义令牌,在这个地方最好把语言改为英文,然后如下步骤:

- Click on API tokens > Create Token > Custom Token > Get started
- Enter a Token name (example: token for example.com)
- Permissions:
- Account – Account Settings – Read
- Account – Worker Scripts – Edit
- Zone – Cache Purge – Purge
- Zone – Page Rules – Edit
- Zone – Zone Settings – Edit
- Zone – Zone – Edit
- Zone – Worker Routes – Edit
- Account resources:
- Include – All accounts
- Zone resources:
- Include – Specific zone – your domain name
- Click on Continue to summary and then on Create token
创建完以后,会看到如下图所示的一个Token,然后将这个Token复制到插件中,就可以了。
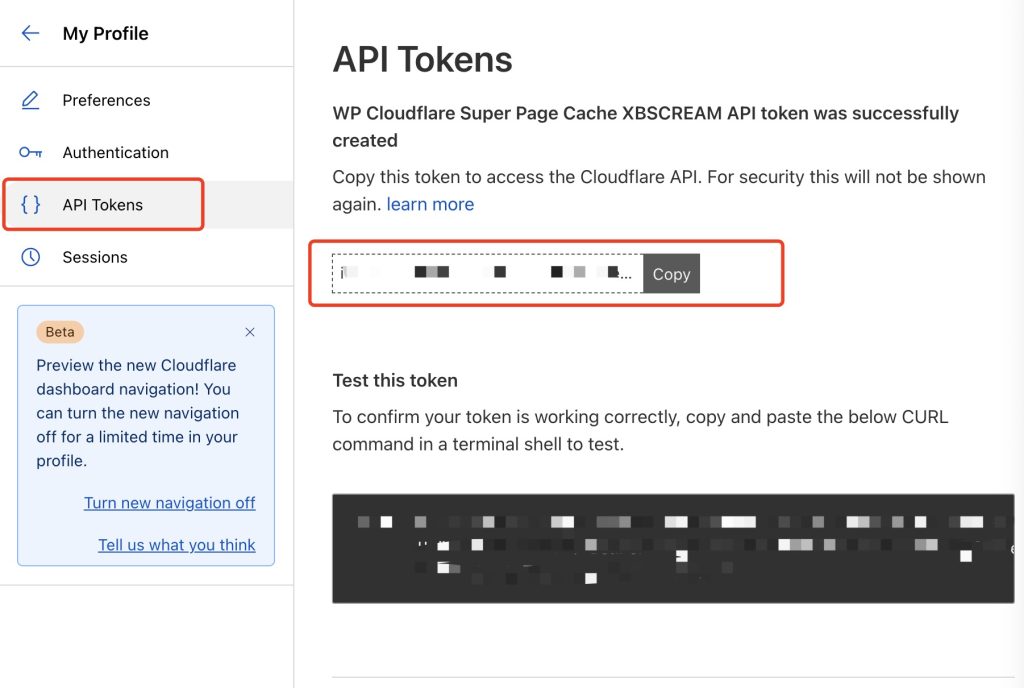
将Token放到插件中以后,有一个Enable Cache的操作,不要忘记了。
如何检测是否配置成功
浏览器访问自己的网站,使用F12去查看。看到cf-cache-status:hit就表示成功了。
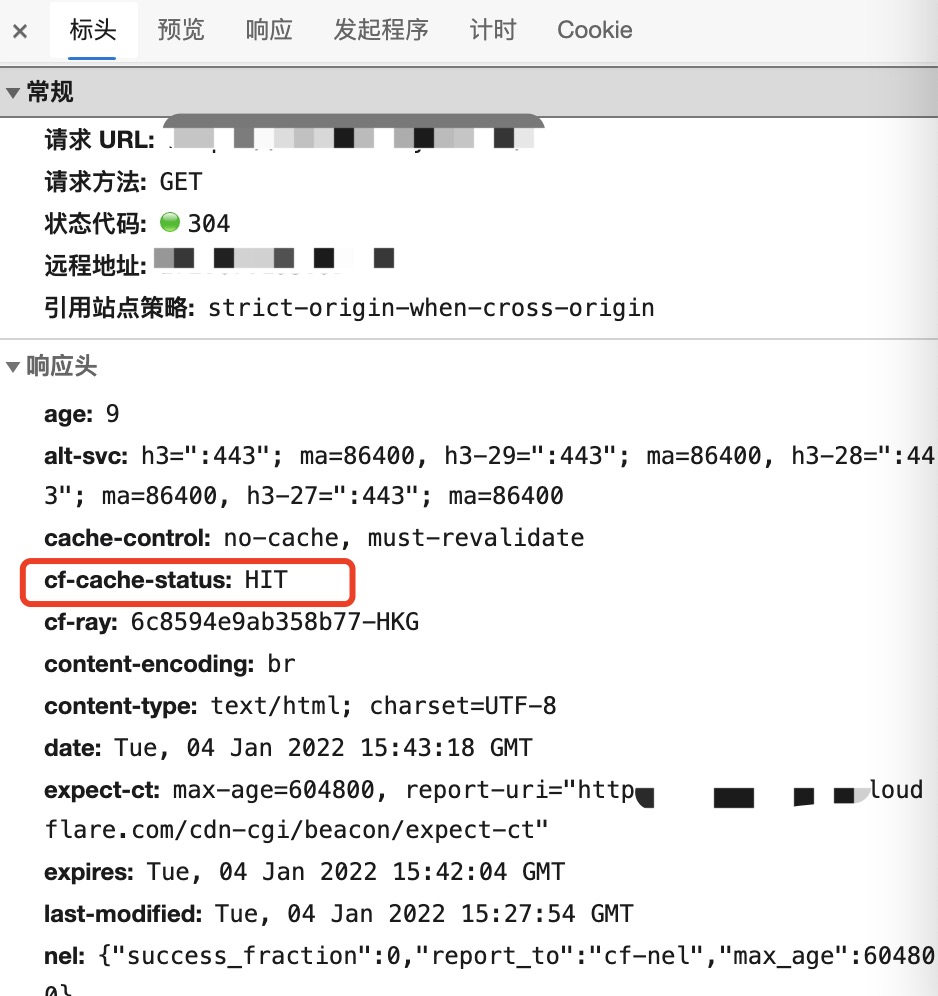
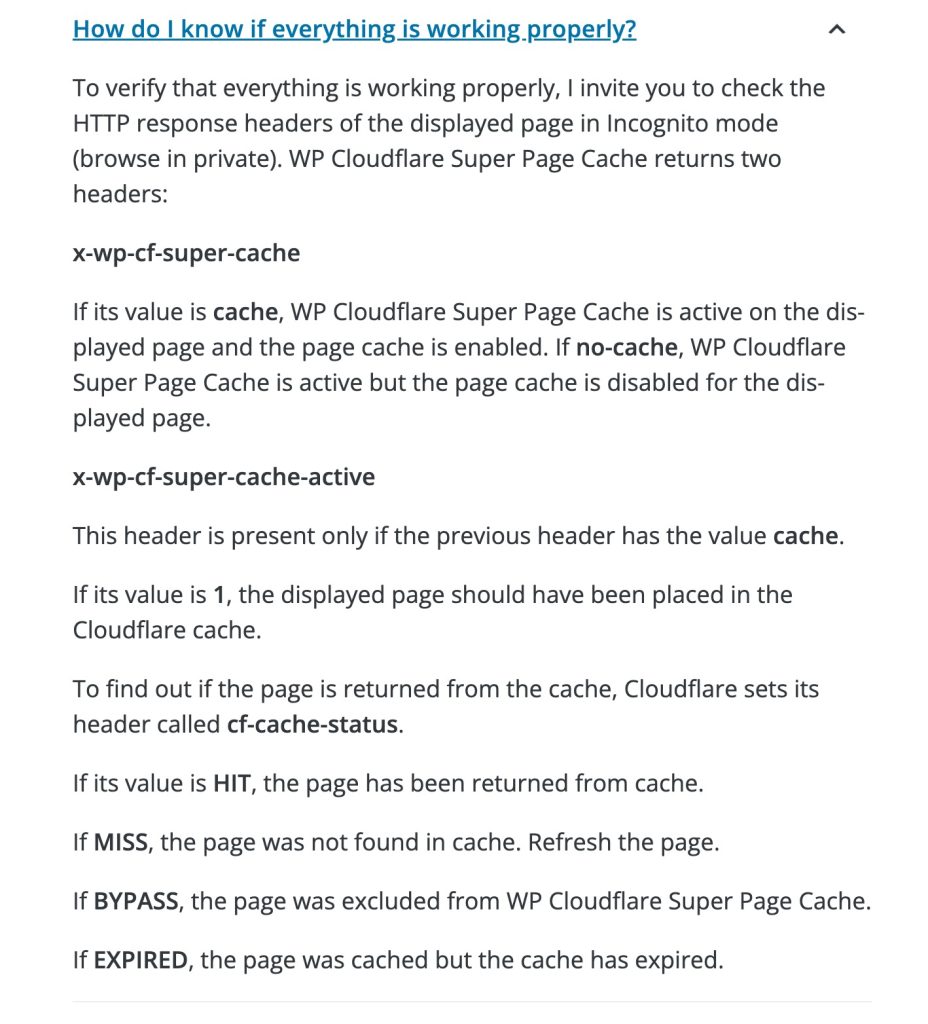
x-wp-cf-super-cache:cache
x-wp-cf-super-cache-active:1
上面这两个值表示正常缓存

解释:
测速总结:
有一个网站Google Speed移动端分数由于71分到了78分。
另外一个站,移动端由于89分到了99分。
影响:
安装这个插件以后,登录后台的时候总会发现网址带了一个参数?swcfpc=1,这个是正常现象,是对于登录的用户不要缓存。
Error:
1. invalid request headers (6003)
Clean Cloudflare Cache, Memcached Cache
Leave a Reply